
Getting approved as a carrier
What the application asks for in the United States, Mexico and Canada, and the steps after your invite.
In 4 steps
- Enter your details
- Add your country's number and documents
- Accept your invite and complete your profile
- Add three references and finish your profile
Every new carrier company is checked by the Cargado team before it can bid. You apply through the carrier application; if an application link has expired, you start a new one. What the application asks for depends on the country your company is based in.
Step 1: Enter your details
Enter your name, work email and phone number. Your title is optional. Then choose Continue and pick the country your company is based in.
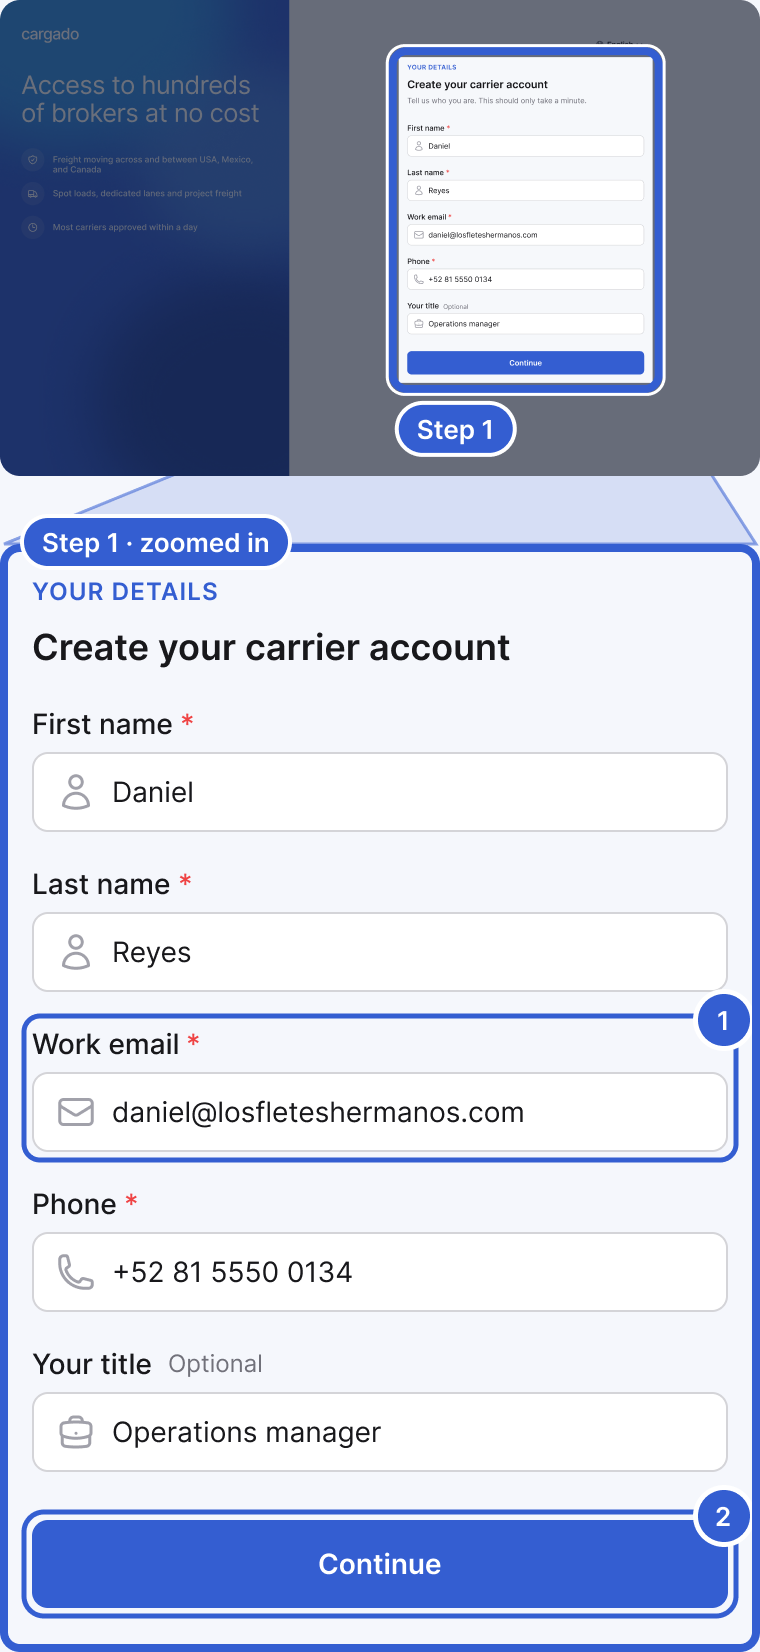
- Work email: the address we send your invite to.
- Continue: takes you to the country screen.
Tip: If your company is in the United States, apply with the email address on your FMCSA registration. When it matches, we may be able to email you an invite sooner, without waiting for our team.
Step 2: Add your country's number and documents
The next screens depend on your country.
- United States: enter your USDOT number. We match it to your FMCSA record and fill in your legal company name from there. There are no documents to upload. You may be offered a short verification step afterward; if so, the button reads Continue rather than Submit for review.
- Mexico: enter your legal business name and the RFC tied to your SICT permit. Tell us whether you also have a USDOT number. Then upload your documents: your Constancia de Situación Fiscal, your acta constitutiva, your SICT permit, a proof of address no older than three months, and your legal representative's ID (both sides of the INE, or the photo page of a passport). Choose Submit for review. If you gave a USDOT number, you may see a verification step first; then the button reads Continue.
- Canada: choose the registration you have: a CVOR number in Ontario, an NIR number in Québec, or an NSC number in every other province. Enter the number and your legal business name. Tell us whether you have a USDOT number and whether you have employees, meaning drivers or staff on your payroll. Then upload your safety fitness certificate, your certificate of incorporation and your certificate of insurance. If you have employees, also upload your workers' compensation clearance (WCB, WSIB or CNESST). Choose Submit for review. If you gave a USDOT number, you may see a verification step first; then the button reads Continue.
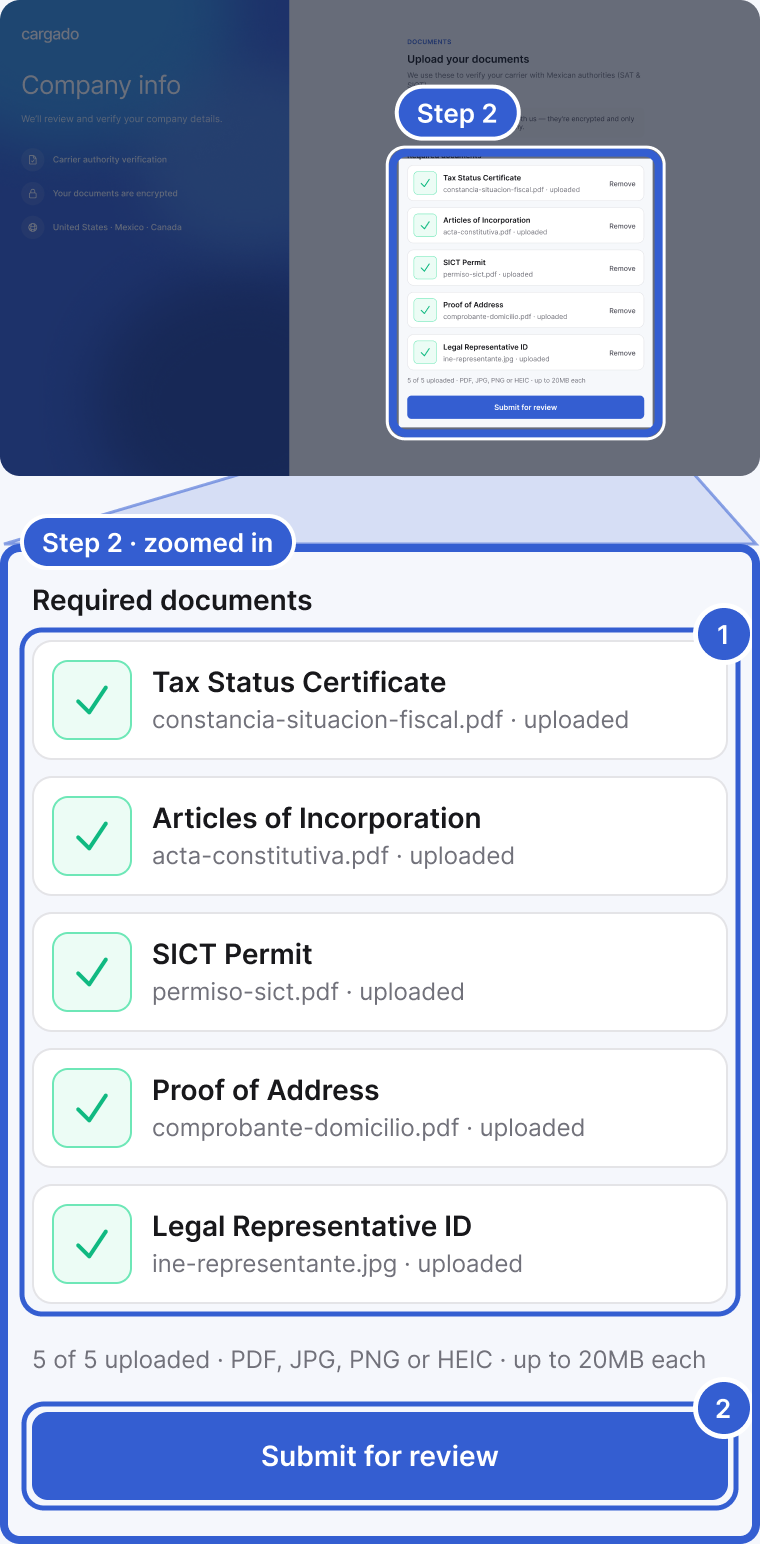
- Required documents: the list for a Mexico carrier. A persona física is not asked for an acta constitutiva, so that list has four documents instead of five.
- Submit for review: sends your application to our team.
Important: For a United States company, we check the FMCSA record as you type. You cannot continue if the number is not found, the authority is not active, the number is registered as a broker rather than a carrier, or the company is registered in another country. Not sure which number you need? See Your DOT, MC, RFC, NSC, CVOR and NIR numbers.
Step 3: Accept your invite and complete your profile
If we did not invite you right away, your application goes to our team, and we email you when the review is done. Open the invite email, set your password and sign in. A short setup then walks you through your profile, operations, service areas, GPS and telematics, inviting your team, and your references. Your equipment and service areas help decide which freight reaches you.
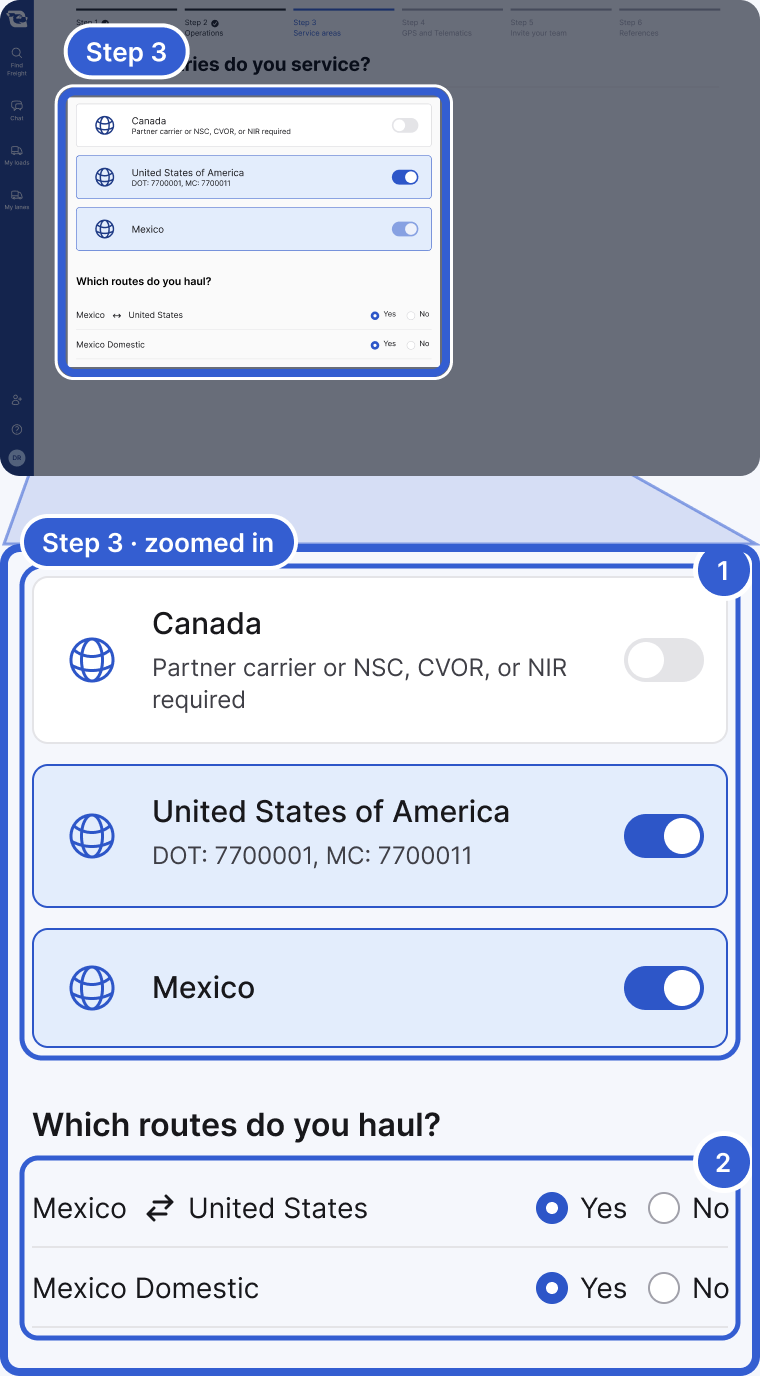
- Service areas: switch on each country you service.
- Which routes do you haul?: answer Yes for each lane you run.
Step 4: Add three references and finish your profile
Give us three companies you have hauled for: brokers or 3PLs, freight forwarders, or shippers. Other carriers do not count. Each reference has to be a different company. Finish profile unlocks once the third one is added.
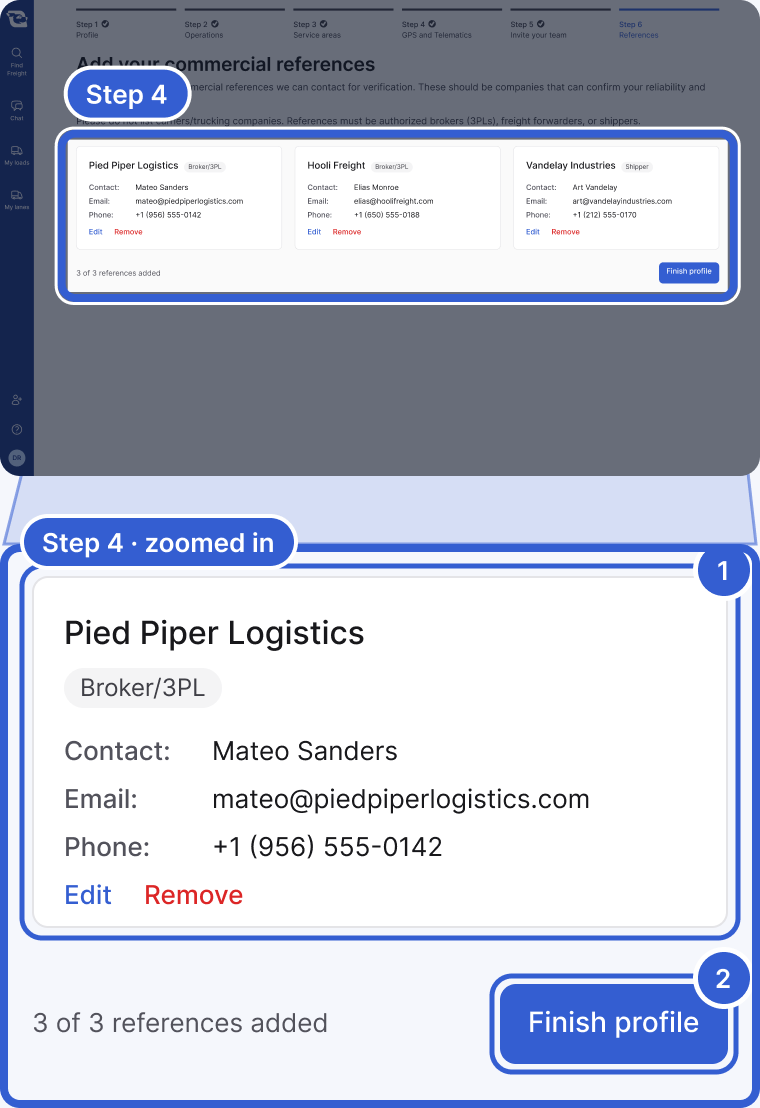
- A reference: the company, its type, a contact name, email and phone.
- Finish profile: unlocks once the third reference is added.
Important: We then check your references. Until we finish, you will see a page that says we are getting you set up. You can still adjust your organization settings in the meantime. Once your references check out, we turn on bidding for your company.
Tip: This step decides how fast you can bid, so let your references know we will be in touch.
Good to know
- Files: documents can be PDF, JPG, PNG or HEIC, up to 20 MB each.
- Stopped partway through? You can come back to your application for 30 days after your last activity. If your company is in Mexico or Canada and you reached the document step, we may also email you a link that picks up where you left off.
- Joining a company that is already on Cargado: if your company already has an active Cargado account, you join it instead of starting a new one, and there are no references to add. Ask an admin at your company to invite you.
- Questions? Email carriers@cargado.com with your company name and the number you applied with.
Still stuck?
Email us and a person on our team will answer. Send the posting link or a screenshot if you have one.