
Install and use the Excel add-in
How to get the add-in into Excel, sign in with your Cargado account, create the Cargado sheets, and every function it gives you.
In 4 steps
- Get the add-in into Excel
- Open Cargado in Excel
- Log in with your Cargado account
- Create the sheets and price your lanes
The Excel add-in puts Market Rates inside your own bid file. It is a Microsoft Office add-in for Excel workbooks. Each person signs in with their own Cargado account; there is no API key to set up.
Step 1: Get the add-in into Excel
Cargado for Excel is an Office add-in, so it reaches your Excel the way your company manages Office add-ins. If you do not see Cargado in Excel, ask whoever manages your company's Microsoft 365 add-ins to make it available to you, or email success@cargado.com.
Step 2: Open Cargado in Excel
On the Home tab, click Show Cargado. The Cargado task pane opens on the right with four steps.
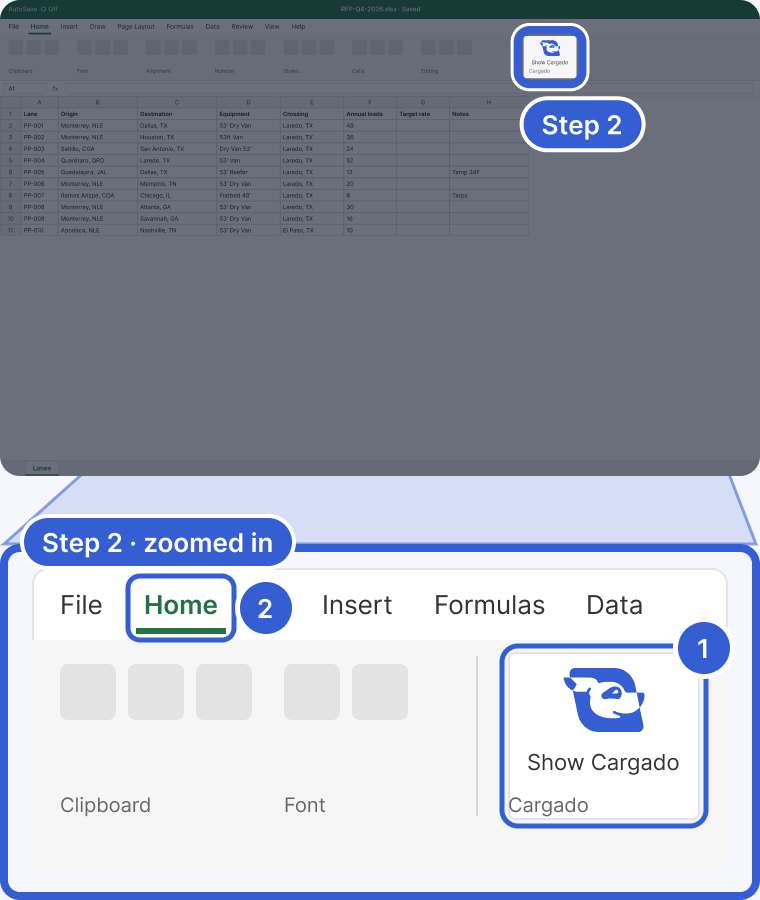
Example: the workbook and its lanes are fictional; the ribbon is drawn generically, so its exact placement in your Excel can differ.
- Show Cargado: opens the Cargado task pane on the right.
- The Home tab, where the button lives.
Step 3: Log in with your Cargado account
Click Log in and sign in in the pop-up window with the same Cargado account you use for the web app. The task pane then shows Welcome and your name.
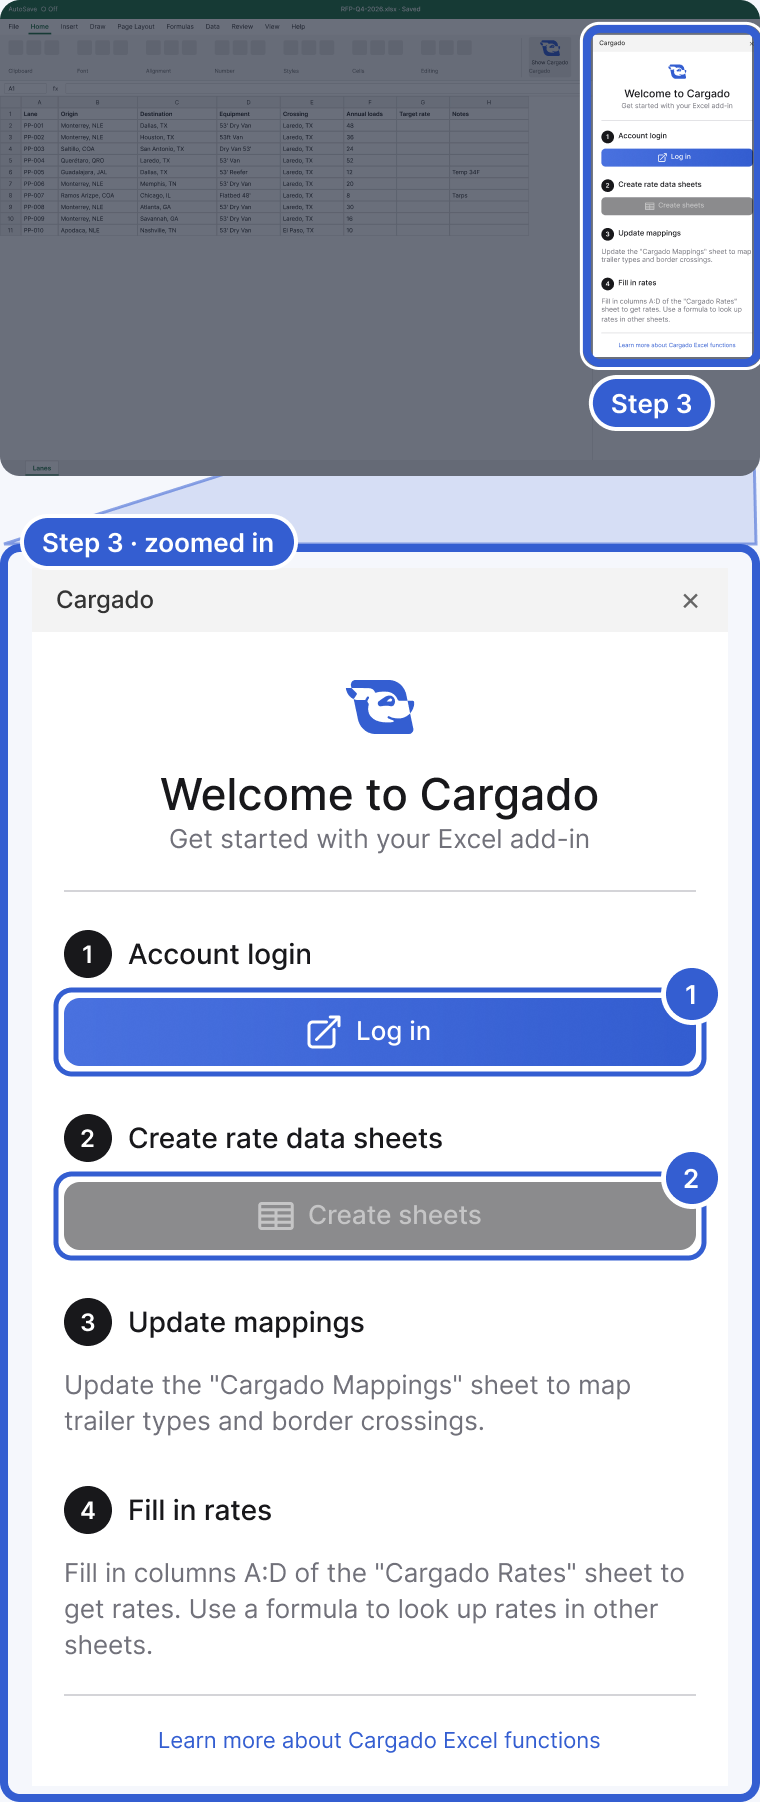
Example: the workbook is fictional.
- Log in: opens the pop-up sign-in window.
- Create sheets stays turned off until you are signed in.
Your sign-in is saved on your device, not in the workbook. If you send a priced workbook to a teammate, they sign in as themselves to refresh it. Use Log out on a shared computer.
Step 4: Create the sheets and price your lanes
Click Create sheets. It adds Cargado Mappings and Cargado Rates to your workbook. If either sheet is already there, nothing is created or overwritten. The full walkthrough, from mapping your RFP's wording to filling formulas down a bid file, is in Price a bid file in Excel.
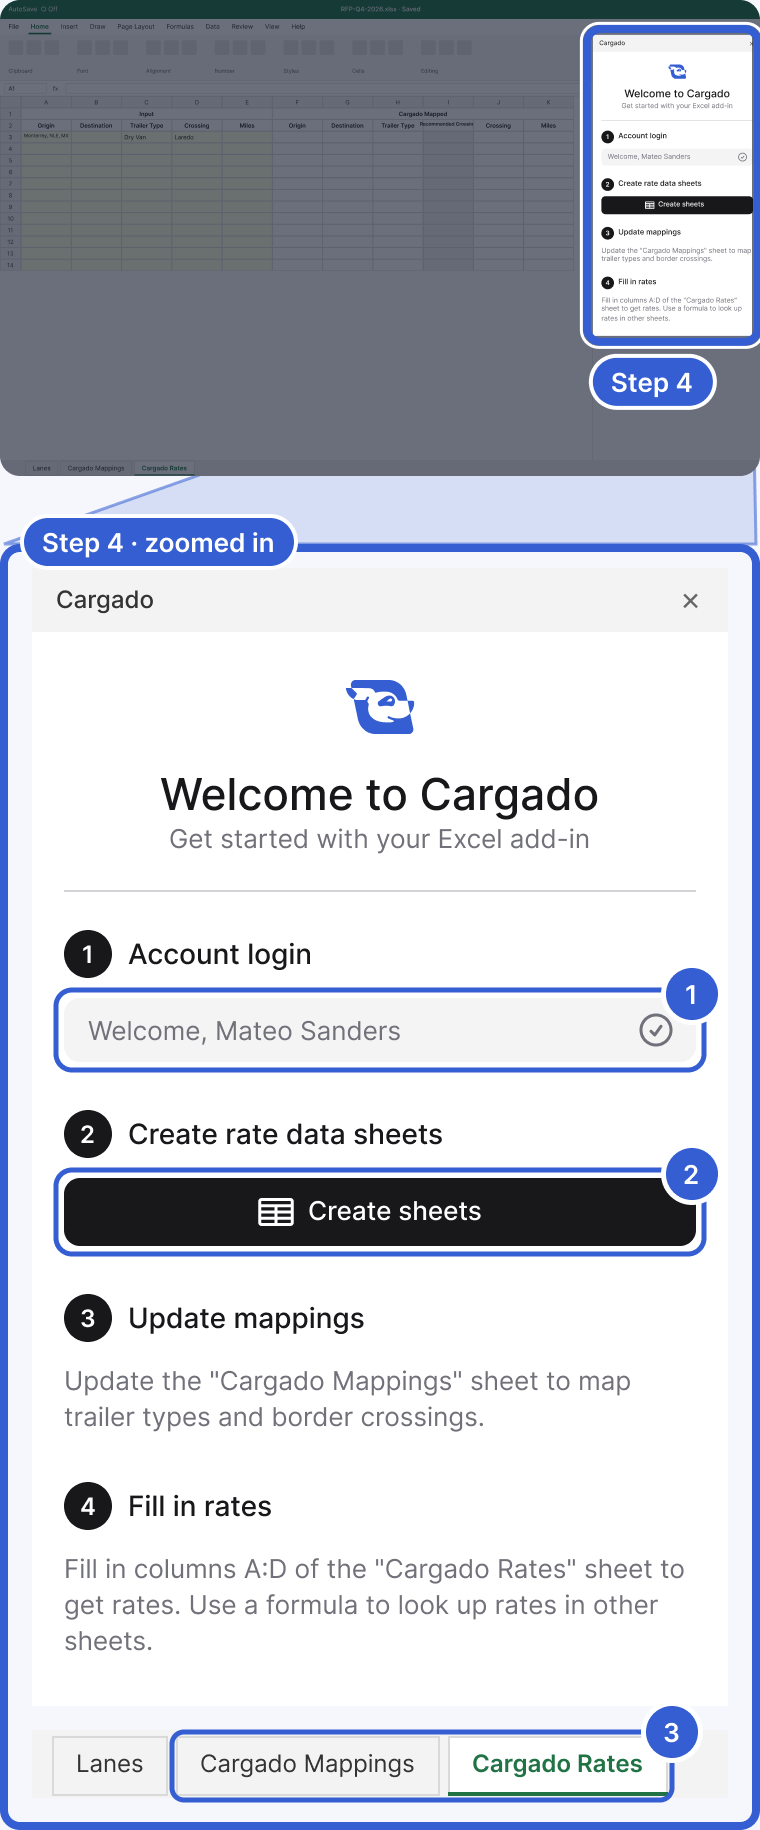
Example: Mateo Sanders and the workbook are fictional.
- Welcome and your name: you are signed in.
- Create sheets: adds the two Cargado sheets to the open workbook.
- Cargado Mappings and Cargado Rates: the sheets it created; your own tabs are untouched.
Important: each lane you price is a market rate lookup. For brokers it counts toward the plan's metered usage the same way as a lookup in the app. Cargado reuses a saved result instead of creating a new lookup when the same lane was already looked up with the same request, currency and rate data vintage, so recalculating a sheet does not always create new lookups. See Plan limits, and what the usage warning emails mean.
The functions
Every function starts with CARGADO. and every rate function takes the same arguments: (origin, destination, trailerType, [crossing], [miles]). Leave out miles and Cargado works out the distance. Leave out crossing and Cargado uses its recommended crossing on a route that crosses the US–Mexico border. The add-in returns rates in USD.
- RATE_HISTORY_P25, _P50, _P75: Low, Mid and High for the latest week, the same figures the app shows.
- RATE_HISTORY_PER_MILE_P25, _P50, _P75: the same three per mile.
- RATE_HISTORY_ALL_IN_P25, _P50, _P75: the latest all-in Low, Mid and High.
- RATE_HISTORY_P50_SPARKLINE: the Mid's weekly history as a text sparkline in one cell.
- RATE_CONFIDENCE: STRONG, MEDIUM or LOWER, when Cargado has it. RATE_CONFIDENCE_SCORE: the 1 to 100 score behind it, when available.
- RATE_MARGIN_OF_ERROR and RATE_RELATIVE_MARGIN_OF_ERROR: the margin of error as an amount and as a fraction of the Mid; empty when Cargado has no error metrics for the lane.
- RATE_ORIGIN_MARKET_NAME, _TYPE, _CODE and the DESTINATION versions: the market each end matched, and whether it is an extended market.
- RATE_ROUTE_MILES: route distance. RATE_CURRENCY_CODE: the currency.
- RECOMMENDED_BORDER_CROSSING, with origin, destination and trailerType: the crossing Cargado recommends, or "No recommendation".
Good to know
- Language: the task pane and its buttons are in English in every Office language.
- Still stuck? Email success@cargado.com.
Still stuck?
Email us and a person on our team will answer. Send the posting link or a screenshot if you have one.