
Manage your team: invites, roles and access
Invite teammates, pick their role, change an admin and deactivate access from Organization > Members.
In 4 steps
- Open Members
- Click Invite a member
- Fill in their details, pick a role and a team
- Manage a member from their row
This article is for broker organizations. Admins and the organization Owner invite teammates and manage their access from Members, under the Organization section of your profile menu.
Step 1: Open Members
Click your avatar, then choose Members under Organization.
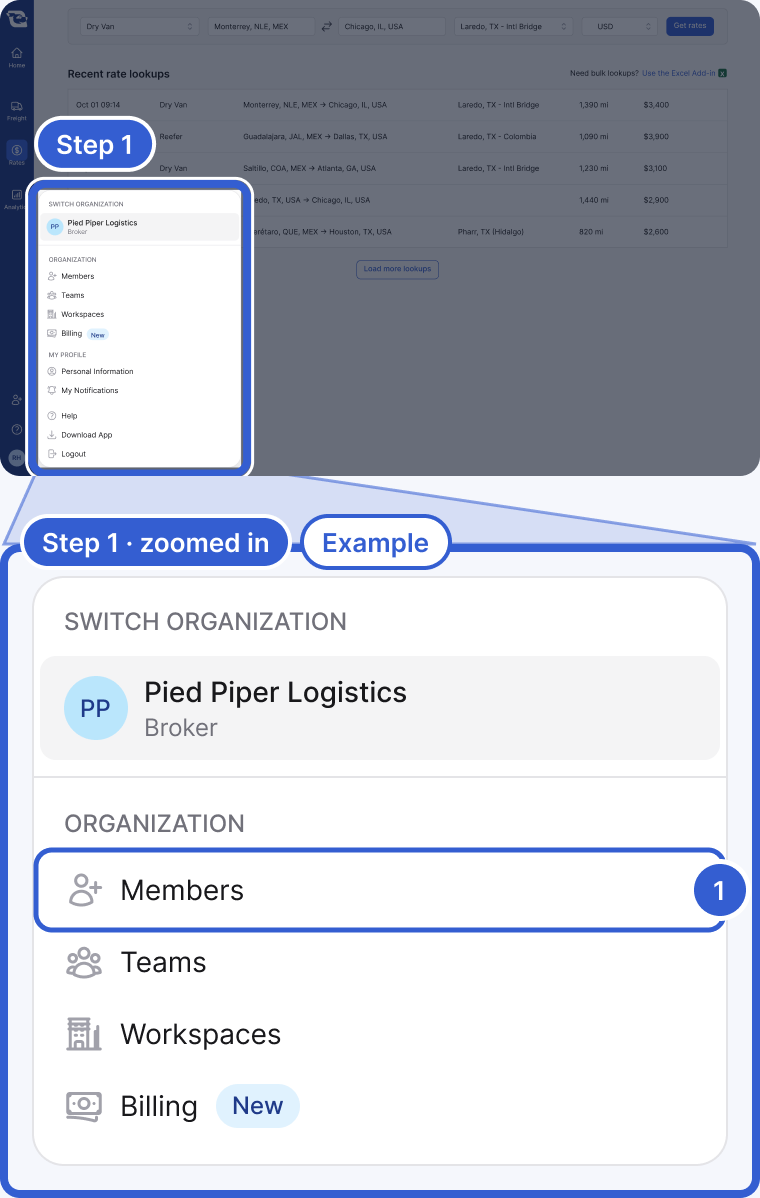
- Members: lists active members and invitations, including expired invitations. Inactive members are hidden until you check Show inactive members.
Step 2: Click Invite a member
If you have the Admin role, you will see an Invite a member button. Only Admins and the Owner can invite; a plain Member does not see this button.
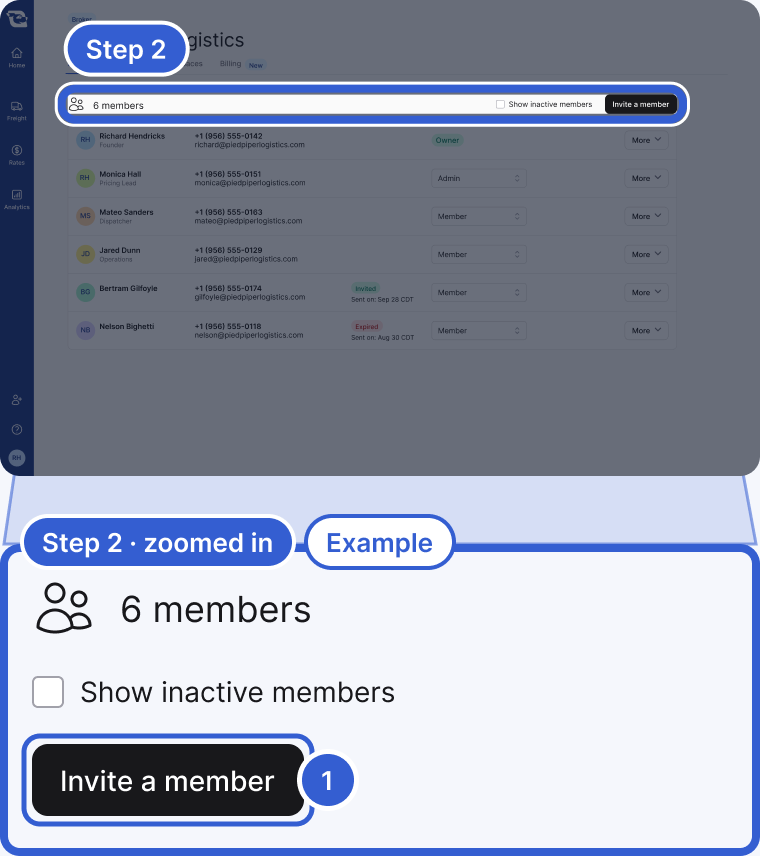
- Invite a member: opens the invite form. Only Admins and the Owner see it.
Step 3: Fill in their details, pick a role and a team
Enter their first and last name, email and language, then choose a role. New teammates default to Member unless you pick something else. Phone number and title are optional.
If your organization has more than one active team, a Team field appears and is required. Team settings help decide who else gets notified, so put people on the team they actually work with. See How do I control my Cargado notifications?
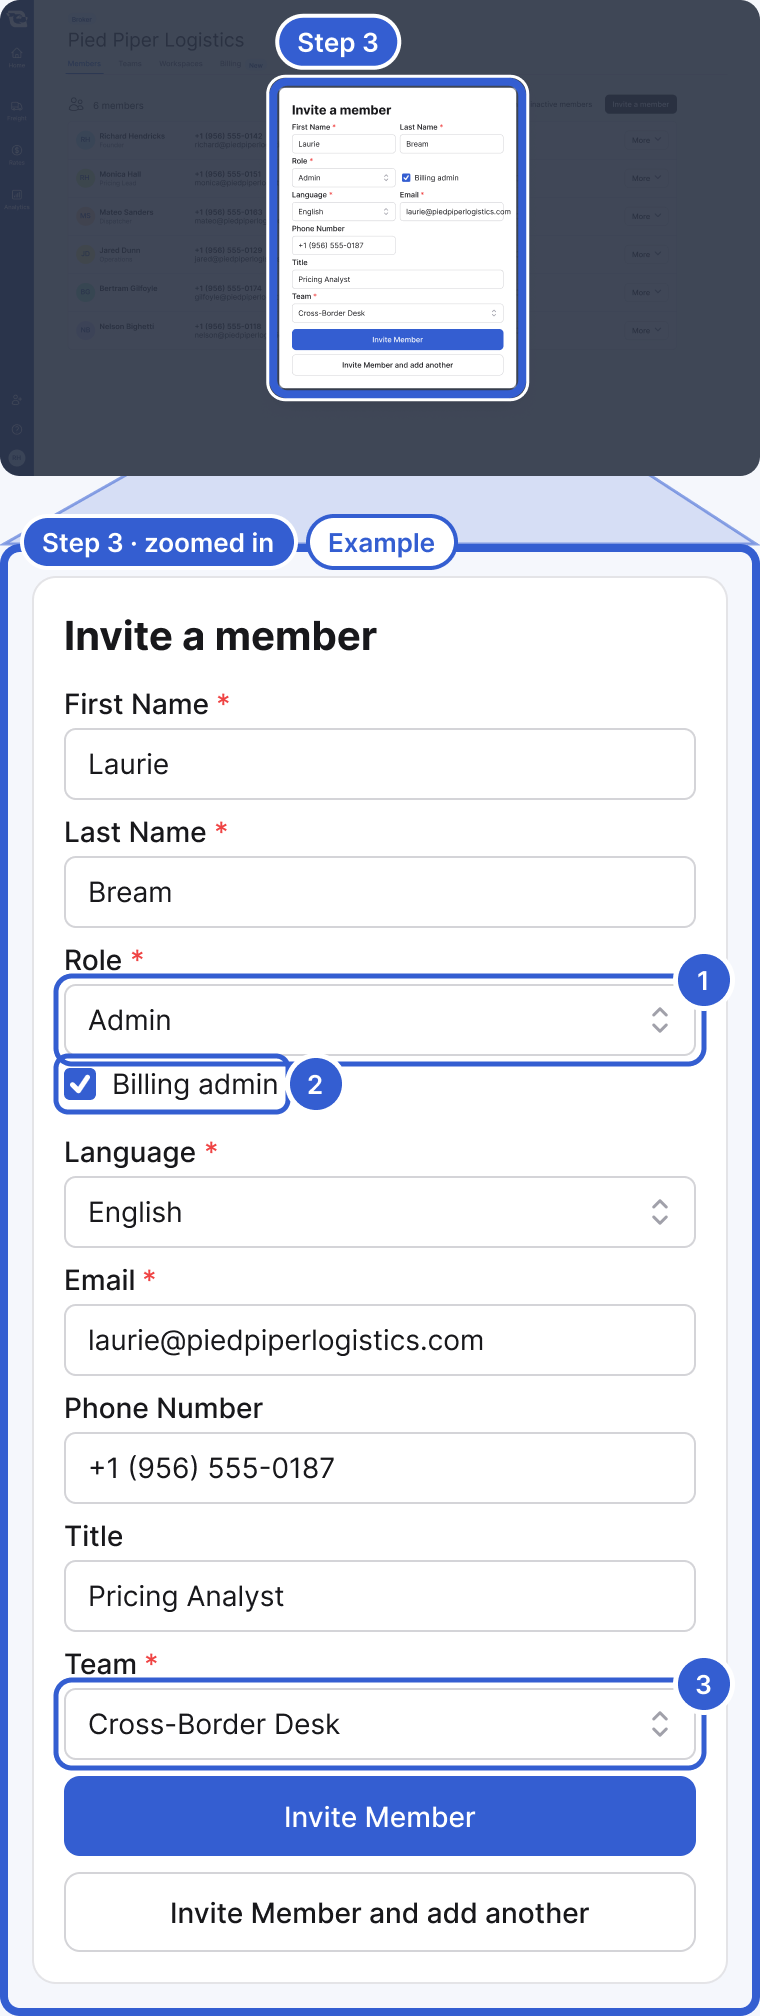
- Role: Member by default. Change it here if you want something else.
- Billing admin: a checkbox available when the role is Admin. The Owner can set it; a plain Admin cannot. It adds access to invoices and subscription payments.
- Team: shown, and required, when your organization has more than one active team. Team settings help decide who else gets notified.
Step 4: Manage a member from their row
To make an existing teammate an Admin, open Members and change their role in the row next to their name. To make someone the Owner, use Make owner from that same row's menu. Only the current Owner sees this option, and it hands ownership over completely: the previous Owner keeps Admin and Billing Admin.
An invite is good for 30 days. After that, it shows as Expired on the Members list. Open the menu next to that person's name and choose Resend invite to send a new one. This cancels the old invite link, so only the newest email works.
The Members page has no delete. Choose Deactivate member to cut off their access. You can bring them back later with Reactivate member: previously accepted members regain access; someone who never accepted their invitation receives a new invitation. An active Owner cannot be deactivated; someone else has to become Owner first.
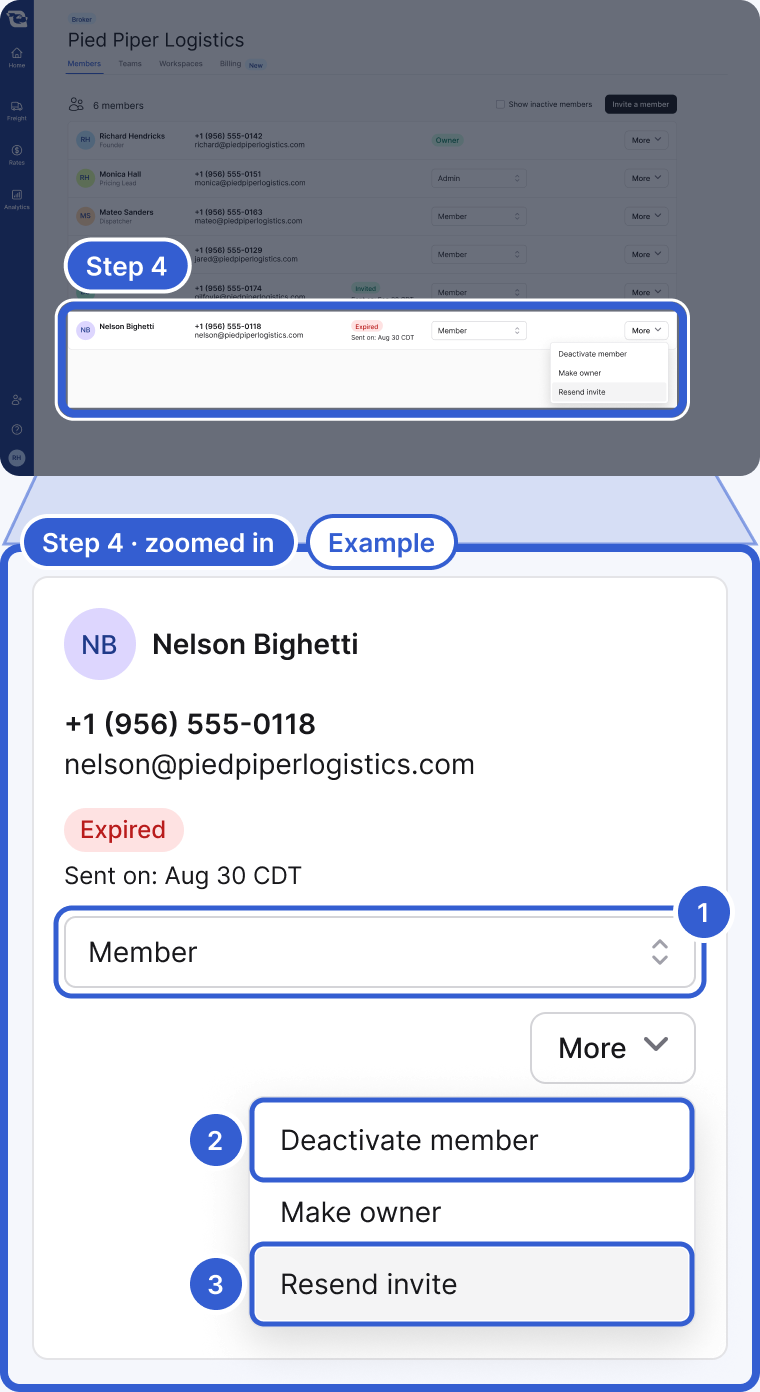
- The role select: changes this person's role, for example to Admin.
- Deactivate member: cuts off their access. Reactivate member restores access for someone who had accepted, or sends a new invitation to someone who never did.
- Resend invite: sends a new invite and cancels the old link.
Important: Cargado may ask a new teammate to set up two-factor authentication before they can sign in. See Two-factor authentication.
The roles, and what each can do
- Member: the default role. Posts and manages loads and lanes, handles bids and bookings, manages your Do Not Use list and chats.
- Admin: everything a Member can do, plus invites and deactivates teammates, changes roles, manages teams, and manages the organization profile and API keys.
- Billing Admin: a checkbox you add on top of Admin. It adds access to invoices and subscription payments, on top of what Admin already covers.
- Owner: one person per organization. Has full Admin and Billing Admin access, and is the only one who can hand ownership to someone else.
Good to know
- They already have an account: if the invite says the person already has a Cargado account, see What happens if I invite someone who already has an account?
- Teams vs. workspaces: a team is a group of people inside your organization. A workspace is a group of freight. They are separate settings. See Workspaces for how freight is organized.
Still stuck?
Email us and a person on our team will answer. Send the posting link or a screenshot if you have one.