
Market Rates for carriers
When Market Rates is on for your company, look up a lane's rate range on the Rates tab. It is free for carriers for a limited time.
In 5 steps
Market Rates gives carriers a reference range for a lane. Depending on how your organization is set up, a lookup can use live or simulated data. For carriers, Market Rates is available free for a limited time. You find it on the Rates tab, where a banner reads "Available free for a limited time".
Step 1: Find the Rates tab
When Market Rates is on for your company, a Rates tab with a New badge appears in the menu on the left (at the bottom of the screen on a phone). If you do not see it, it is not turned on for your company yet.

- The Rates tab with its New badge: shows when Market Rates is on for your company.
- The banner: Market Rates is available free for a limited time.
Step 2: Enter the lane
Pick a trailer from Select trailer type, then choose the Origin and Destination from the suggestions. Places in the United States, Mexico and Canada are supported. On a lane between Mexico and the United States or Canada, choose a crossing from Select border crossing. When Cargado has recommendations for the lane, they are at the top and the first one is already selected.

- Select trailer type.
- Origin and Destination, chosen from the suggestions.
- Select border crossing, on a lane between Mexico and the United States or Canada. When there are recommendations, they are at the top and the first one is already selected.
Step 3: Pick a currency and get rates
Choose USD, MXN or CAD, then click Get rates.
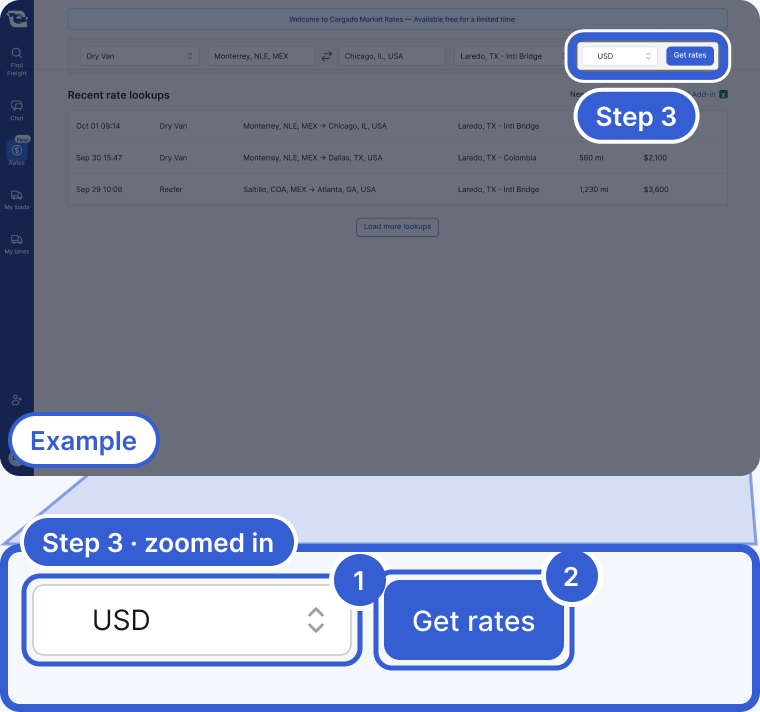
- The currency: USD, MXN or CAD.
- Get rates.
Step 4: Read the band
A successful lookup gives three numbers for the latest period returned:
- Low (p25): a quarter of the data behind the lookup sits at or below this.
- Mid (p50): the median.
- High (p75): a quarter sits at or above this.
The figures are a total per load and include fuel. When a confidence label is shown (Strong Confidence, Medium Confidence or Lower Confidence), it tells you how much uncertainty there is around the median, and when there is enough history, History: Trailing 12 weeks shows how the lane has moved. See How to read a market rate for more.

- Low, Mid and High: the latest period returned, per load, fuel included.
- The confidence label: how much uncertainty there is around the median.
- History: Trailing 12 weeks: how the lane has moved.
Step 5: Use it when you bid
A bid near the Mid is near the median of the band. A bid well above the High is above most of the data behind it. Your own costs still come first. The band is a reference; it does not calculate what your truck needs to earn.
Tip: everyone at your company sees the same list of past lookups under the form, so a dispatcher can reuse a lookup a teammate already ran.
Good to know
- No rate on a lane: a lane can come back with We don't have enough data on this lane instead of a band.
Still stuck?
Email us and a person on our team will answer. Send the posting link or a screenshot if you have one.