
How do I set up my company profile so the board shows the right freight?
Fill in Operations and Service Areas after approval. They decide which postings show on your Load board and which ones you get alerts for.
In 4 steps
- Fill in Operations
- Choose where you run in Service Areas
- Finish the setup
- Confirm your personal freight preferences
Step 1: Fill in Operations
Until your profile is set up, people who can edit it go to a short setup instead of the board. The steps open in order. First, check your company details on Review your profile and click Submit & Continue.
On Operations, enter your drivers, power units and trailers. Add your trailers by type, and check the special load types you run, such as Hazmat or Power Only. Click Submit & Continue.
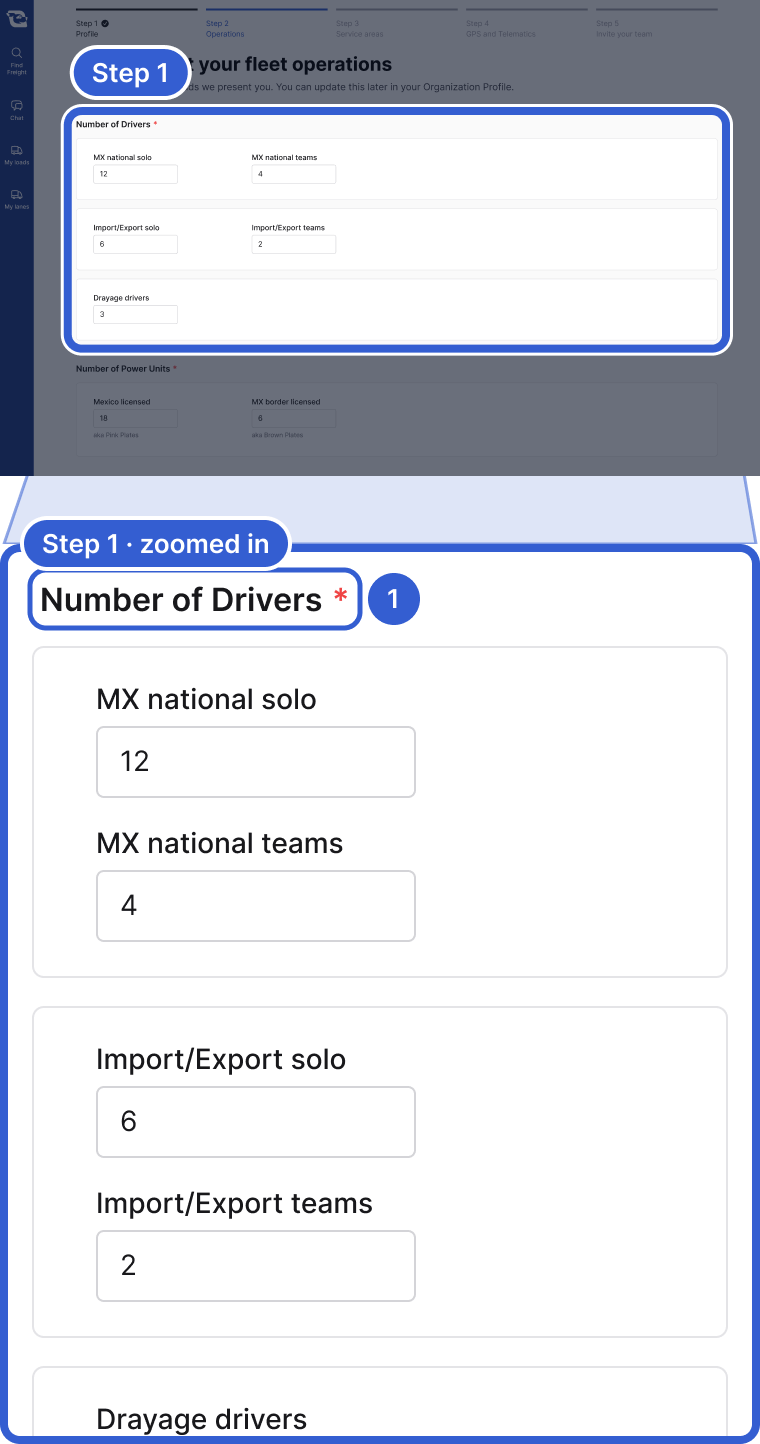
- Number of Drivers, then power units and trailers. All three are required.
Step 2: Choose where you run in Service Areas
Answer each question in turn: What countries do you service?, then Which routes do you haul? If you pick Mexico and at least one other country, you also answer What border crossings do you use? Last, choose where you pick up and deliver in each country.
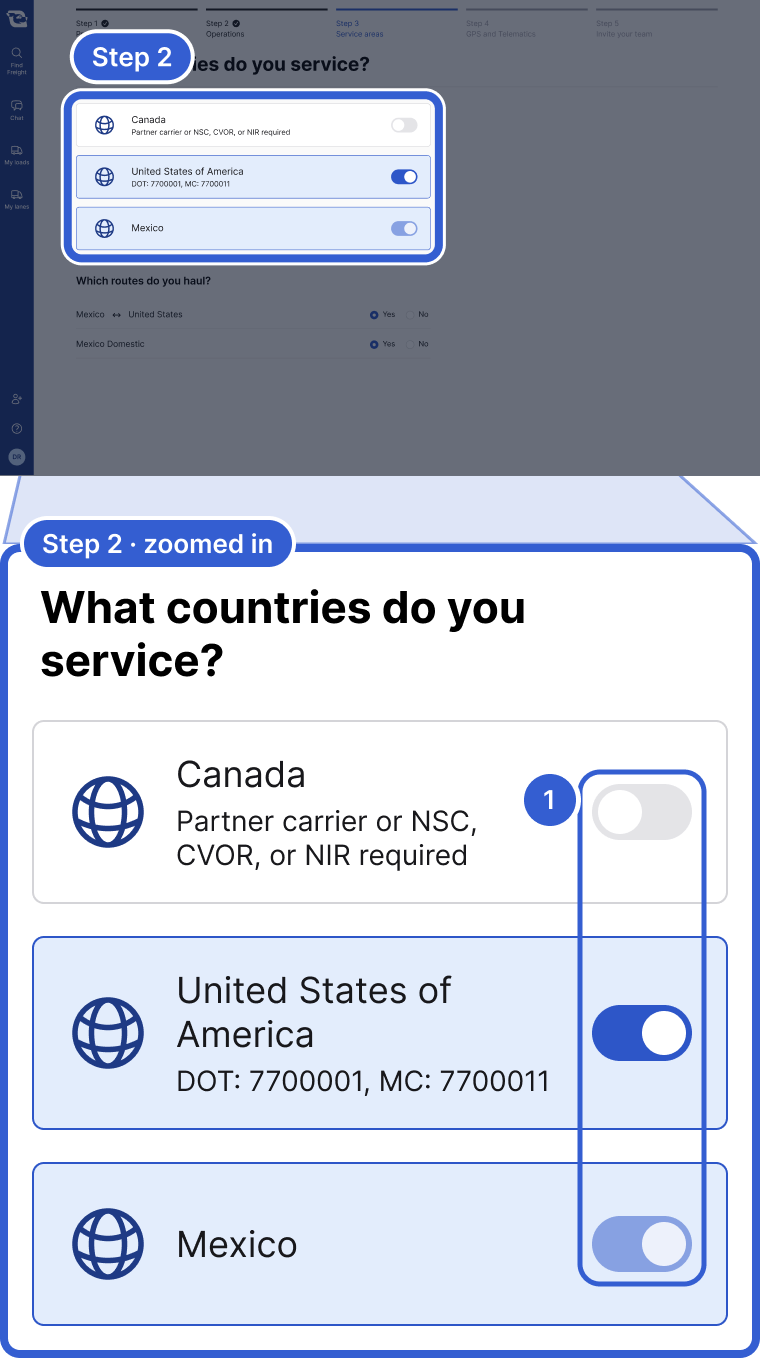
- Turn on each country you serve. Your registration sets the choices.
Note: A Canadian carrier, for example, needs a USDOT number for the United States or Mexico.
Step 3: Finish the setup
You can skip GPS and Telematics for now with Skip. On Invite your team, you can add coworkers. See How do I add people from my company? Then click Finish profile.
Step 4: Confirm your personal freight preferences
The first time each person opens the board, a window called Set your personal freight preferences appears. It starts from the company profile and stays open until you confirm it. Narrow it to the freight you handle, then click Confirm and view load board.
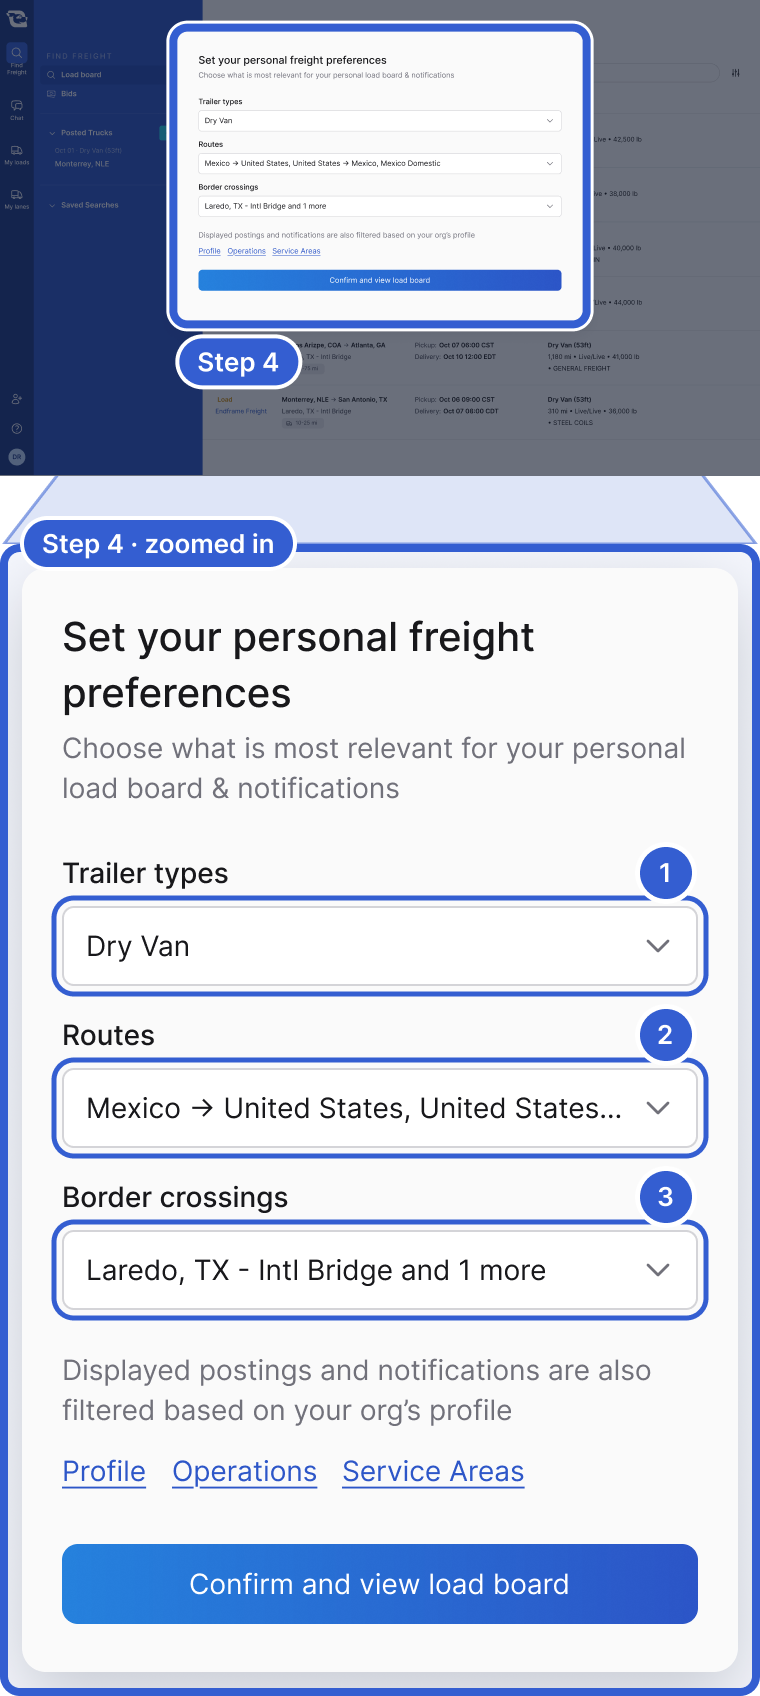
- Trailer types you want to see.
- Routes you run.
- Border crossings, when your company runs Mexico and another country.
Tip: Your first confirm also sets up email alerts for postings that fit you. Alerts you already had stay as they are.
Change your preferences later
Click the sliders icon (Customize) next to the search bar on the Load board.
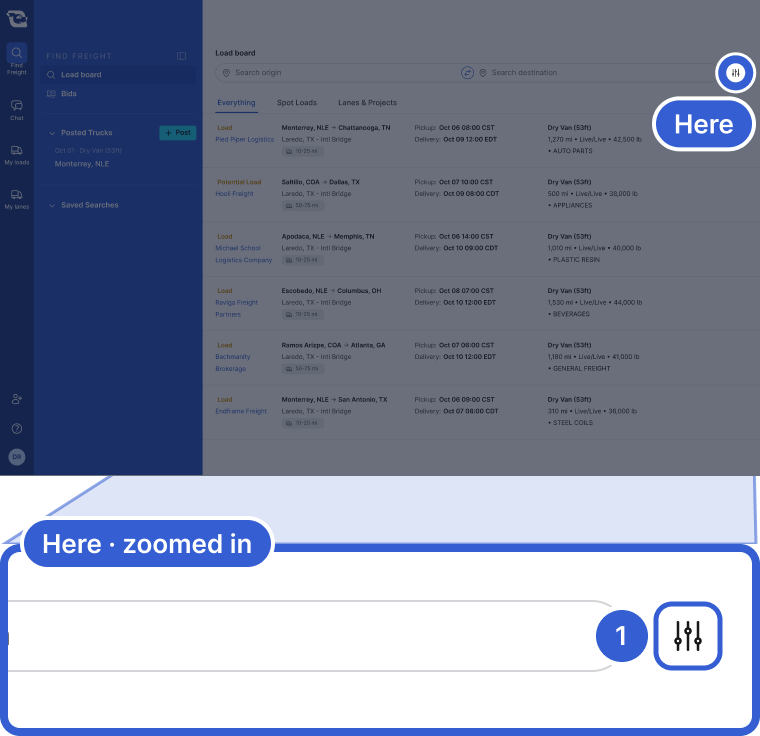
- Customize opens your personal freight preferences again.
Good to know
- When: set up your profile as soon as your company is approved. Still in review? See Getting approved as a carrier.
- What the board shows: postings that fit your trailers, routes, crossings and profile. When those run out, it adds Expanded results: and then All freight:.
- Missing details: if something is missing from your profile, you can miss freight that fits you.
- Edit later: click your initials and look under Organization for Operations and Service Areas.
- Countries: to add or remove one, click Change service area countries.
- Can't edit the profile? You skip the setup and see only the preferences window. Ask a teammate who can edit it.
Still stuck?
Email us and a person on our team will answer. Send the posting link or a screenshot if you have one.