
Look up a market rate in the app
Price one lane on the Rates tab: trailer, origin, destination, crossing and currency, then read, share or post from the result.
In 5 steps
- Open the Rates tab
- Enter the lane
- Pick a crossing and currency, then Get rates
- Read the result
- Find and share past lookups
To price a lane in the app, open the Rates tab, enter the trailer and both ends of the lane, and click Get rates. The result is saved for everyone in your company to see.
Step 1: Open the Rates tab
Click Rates in the menu on the left. On a phone, the menu is at the bottom of the screen.
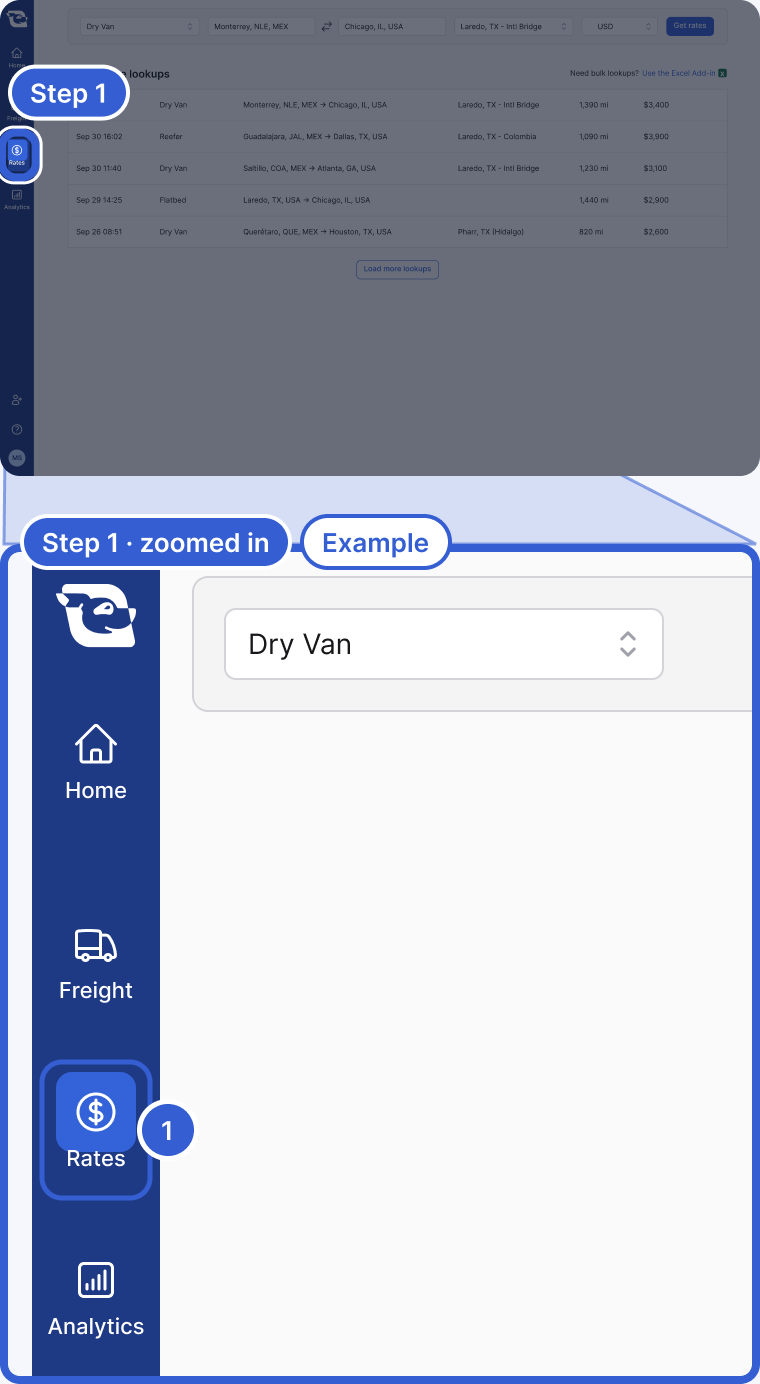
- Rates: opens the Market Rates page with the lookup form at the top.
Step 2: Enter the lane
Pick a trailer from Select trailer type. Then type the Origin and the Destination. Choose a suggestion from the list for each. Places in the United States, Mexico and Canada are supported, as a city or a postal code.
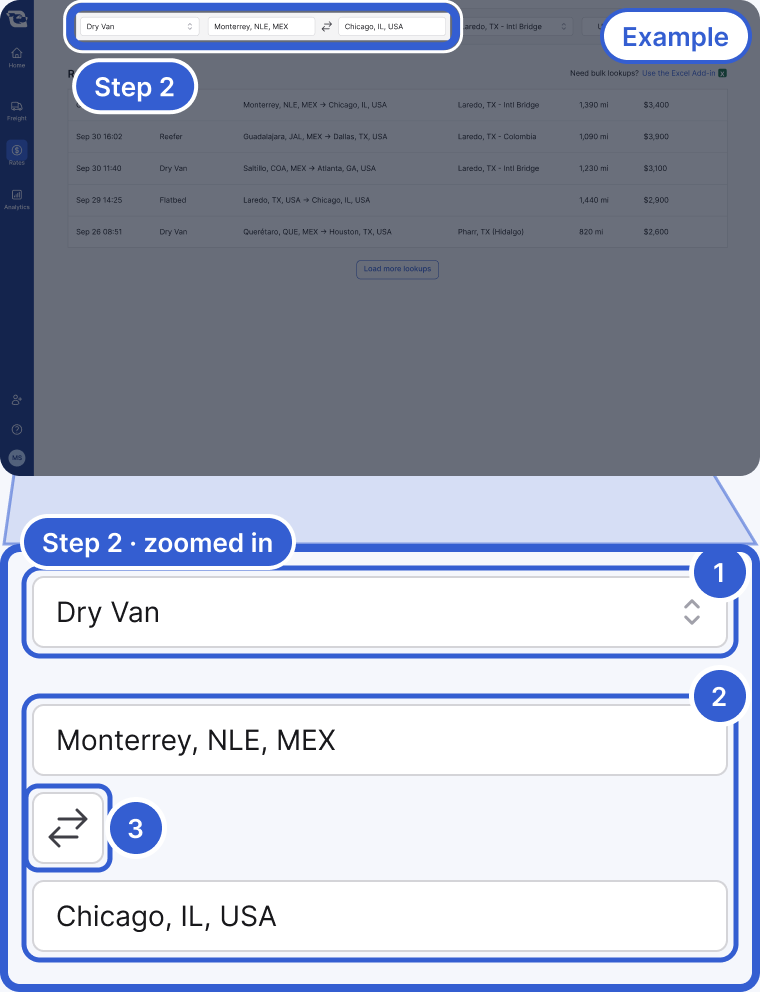
- Select trailer type: the rate is priced by trailer category.
- Origin and Destination: type a city or postal code and pick a suggestion.
- The swap button: reverses the lane.
Tip: The rate is priced by trailer category, so a double or multi-axle version of a trailer prices with its category.
Step 3: Pick a crossing and currency, then Get rates
On a lane between Mexico and the United States or Canada, a Select border crossing list appears. When Cargado has recommended crossings for that lane, they sit at the top, marked (recommended), and the top one is selected for you. Change it if your freight crosses somewhere else. Then pick USD, MXN or CAD. Once the lane and trailer are set, the list can mark one currency as (suggested). Click Get rates.
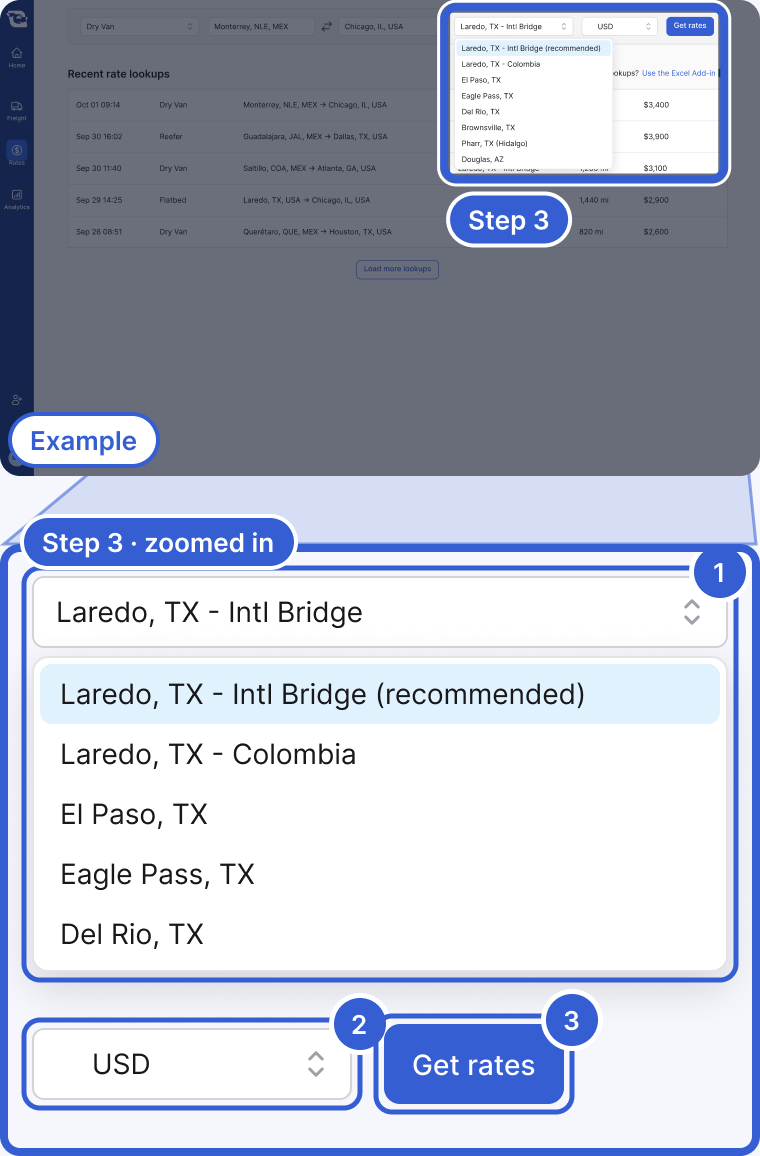
- Select border crossing: shows on lanes between Mexico and the United States or Canada; when there is a recommended crossing, the top one is preselected.
- Currency: USD, MXN or CAD; one may be marked (suggested) based on the lane.
- Get rates: stays disabled on a lane between Mexico and the United States or Canada until a crossing is chosen.
Step 4: Read the result
The result page shows the lane's markets, route distance, crossing (when the lane has one) and trailer category. Below that is the Rate range card with Low, Mid and High, a confidence label when one is available and, when there is enough history, the History chart. See How to read a market rate for what each part means.
If you have the freight, click Post next to Post freight based on this lookup. A new posting opens with the origin, destination, crossing and trailer already filled in.
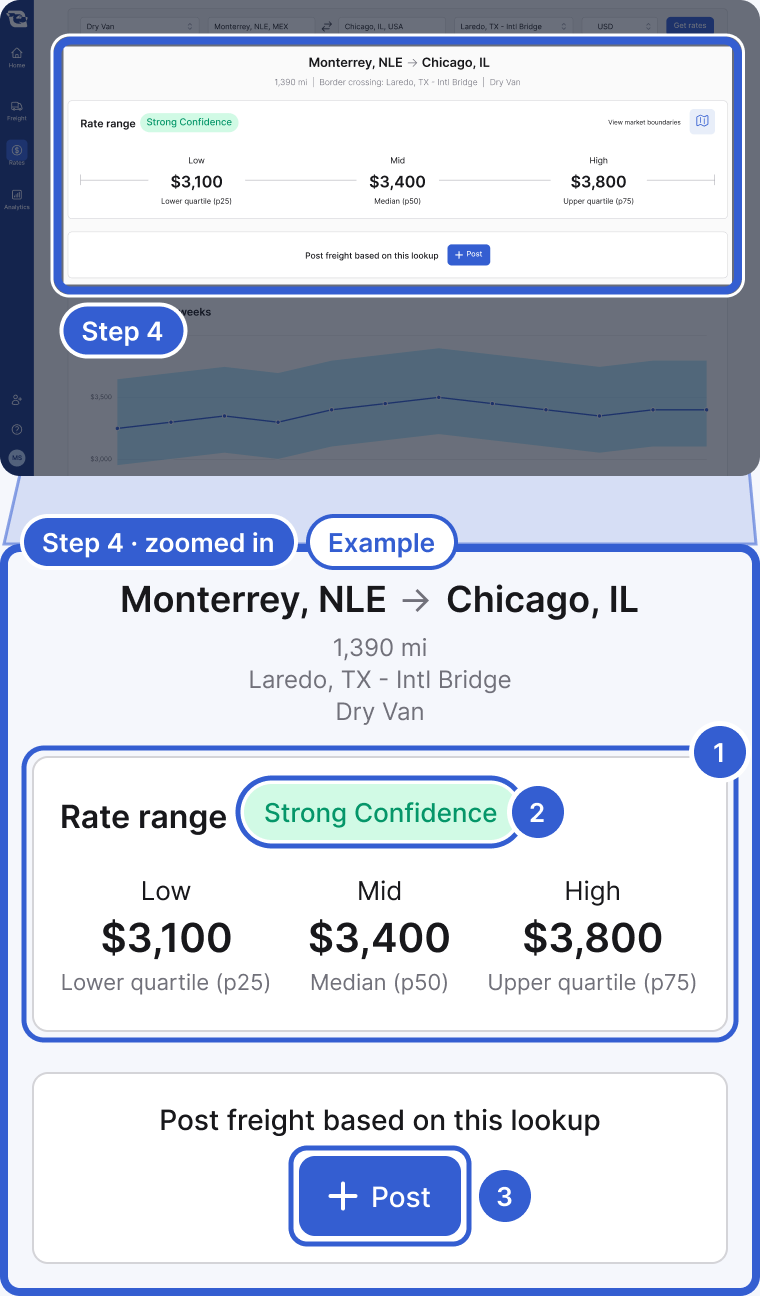
- Rate range: Low, Mid and High are the 25th, 50th and 75th percentiles of the market data behind the lookup.
- The confidence label: hover for an explanation of the margin of error and, when available, its amount and percentage.
- Post: opens a new posting with the lane already filled in.
Step 5: Find and share past lookups
Recent rate lookups on the Rates tab lists your company's saved lookups, newest first. Click Load more lookups to go further back. Each lookup has its own link that any teammate can open. A saved lookup keeps the result it had on the day it ran, so run a new one when you need the latest available number.
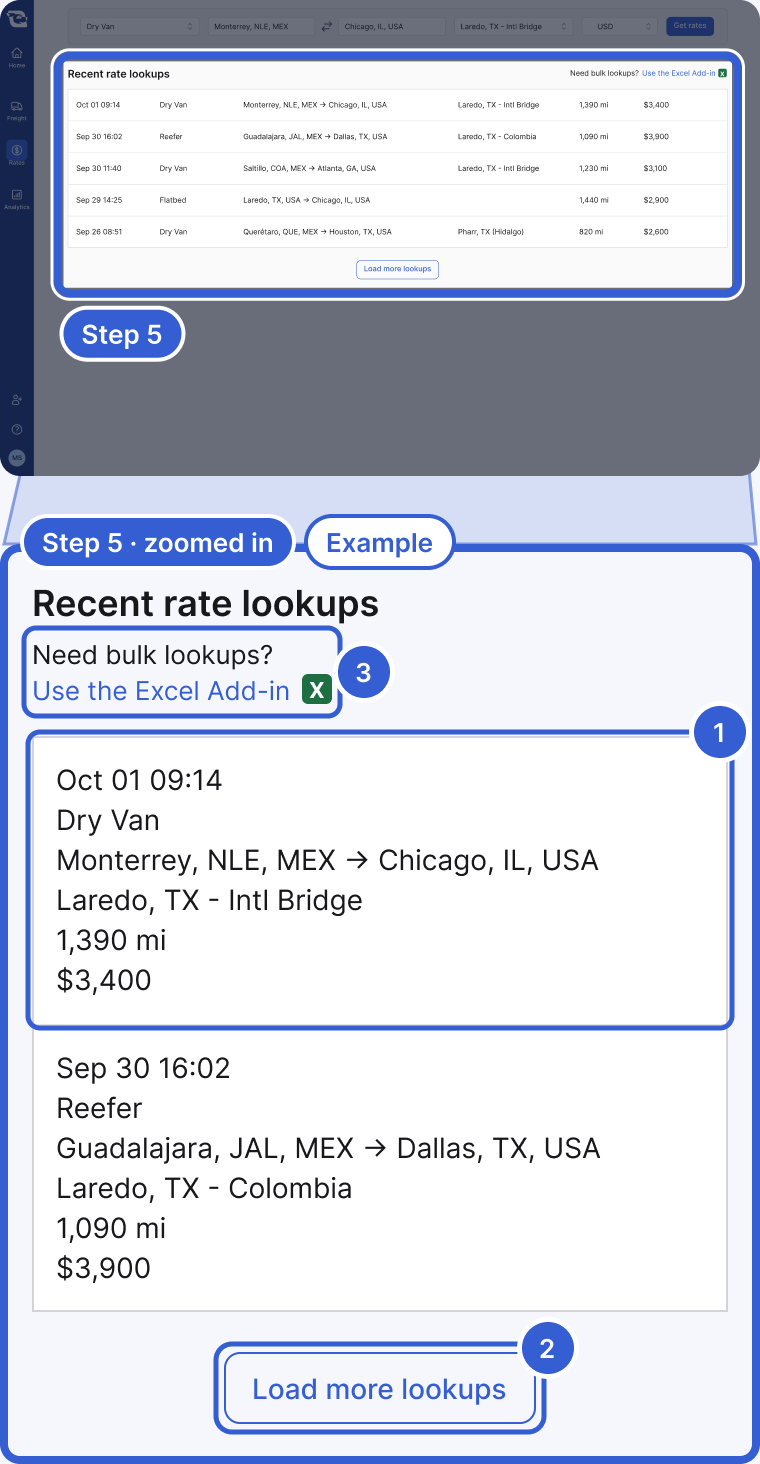
- A saved lookup: click it to open the result again or share its link.
- Load more lookups: shows up to 10 more lookups.
- Use the Excel Add-in: for bulk lookups.
Tip: Pricing a whole RFP? Use the Excel add-in instead. See Price a bid file in Excel.
Good to know
- No access yet: if your company does not have Market Rates yet, the Rates tab opens a page with a Request Market Rates Demo button. It does not turn access on by itself.
- Live or simulated data: a lookup runs on live market data or on simulated data, depending on how your organization is set up.
- Pricing while you post: you do not have to leave the posting form to price a load. When you post freight that Market Rates can price, the form shows a Market Rate card with Low p25, Mid p50 and High p75 for the lane. The card shows rates when data is available; otherwise it can show a no-data or error message. These lookups count the same way as lookups on the Rates tab.
Still stuck?
Email us and a person on our team will answer. Send the posting link or a screenshot if you have one.